| < Previous page | Next page > |
Get Started with NetMapUpdated 2020.
Welcome to NetMap! NetMap’s Virtual Watersheds and Analysis Tools allow users to better understand their watersheds and the relationships between land uses and the natural environment. NetMap is a decision support tool providing critical information to address a host of geospatial applications involving climate change, grazing, forestry, urbanization, production of drinking water, transportation, energy development, restoration and conservation. NetMap consists of:
i) Virtual Watershed databases (individual watersheds approximately 500,000 acres [2000 km2])
ii) NetMap_files (support programs),
iii) ONE ArcMap 10.X Add-In
iv) Online Technical Help (http://www.netmaptools.org/Pages/NetMapHelp/netmap.htm)
Follow the instructions below to get NetMap started on your computer (you will need one or more NetMap datasets, approximately 1-4 GB each).
Requirements include a 64 bit computer, Windows 7, and sufficient memory (>= 4 GB, more is better). An updated ESRI ArcMap 10.x is required. A couple of tools require spatial analyst.
Step 1: You should have received download links for the NetMap tools add-in the supporting files; they should look something like this:
NetMap Add-In:
https://nm3.s3.amazonaws.com/NetMap_add_in_3.1.9.zipx
NetMap Files:
https://nm3.s3.amazonaws.com/NetMap_Files_319.zipx
Step 2: Create a NetMap folder on a local hard drive (C or another local hard drive), and move the zipped files into that folder. It’s advisable that you create this folder directly on the C: drive (or another internal hard drive) as opposed to putting it into a Programs file space (not recommended). You should have a NetMap folder set up with two zipped files downloaded from the website. You will need to unzip the NetMap_Files_.zip folder. To do this right click on the file and click “Extract All” in the drop down menu. Once extracted, the original .zip file can be deleted.
You should end up with a NetMap_Files folder that has the following folders in it (figure below).
 Step 3: Within C:\NetMap (or other local drive:\NetMap, create a third folder called “NetMap Datasets”). Copy the dataset folder(s) into that you have into that new folder. Once again, right click on each of these and click Extract All in the drop down menu. The Destination file pathway will appear. Note that using Windows (not WinZip) to extract files from a zip file will often add another folder to this pathway and this will interfere with accessing NetMap's virtual watersheds.
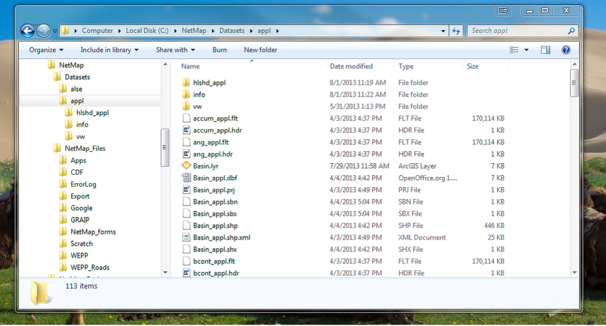
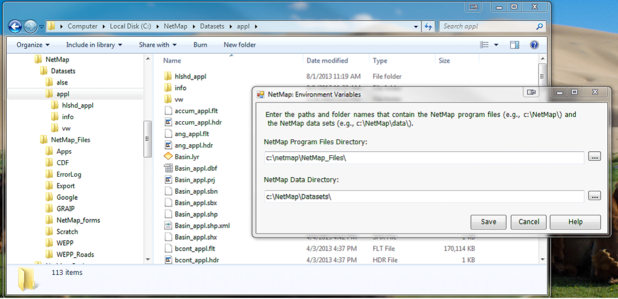
To prevent this, remove the last name in the pathway; i.e. change C:\NetMap\NetMap Datasets\”example dataset” to just plain C:\NetMap\NetMap Datasets\. This will extract the dataset and give it the same name as the original zip file. You should now have three file folders in C:\NetMap: NetMap_Files_07_18_2013, NetMap_AddIns_Release 2.0.3 and NetMap Datasets containing all your unzipped watershed datasets. Here’s an example of what it will look like if files have been extracted properly for the “appl” dataset.
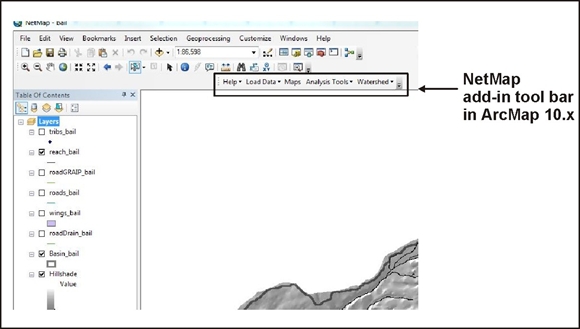
 Step 4: Next, install the NetMap add-ins. Double click NetMap_AddIns_.zip and then double-click each add-in individually to install (ArcMap should be closed). This will go quickly and you will not need to unzip this file to do this. Open ArcMap, and your NetMap toolbars should show up. If the toolbars do not show up, right-click on the ArcMap toolbar area and check the NetMap Add-in boxes. Also, all tool bars may sit on top of one another, thus obscuring all but the top one. Just click on and hold the add-ins and place them into the tool bar area for easy access. If any of the add-ins appear truncated (particularly possible in the wider Basic Tool Module), use the small arrow on the interface to expand it horizontally.
Here is what your tool bar should look like with the NetMap tools.
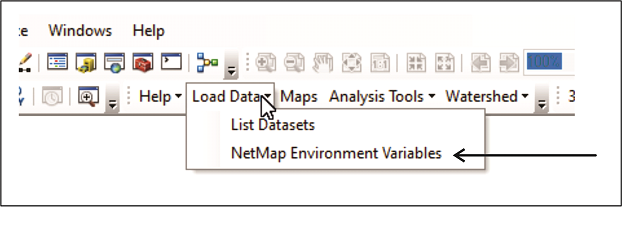
Step 5: In ArcMap, find the NetMap toolbar, and click “Load Data”, and then “NetMap Environment Variables”.
  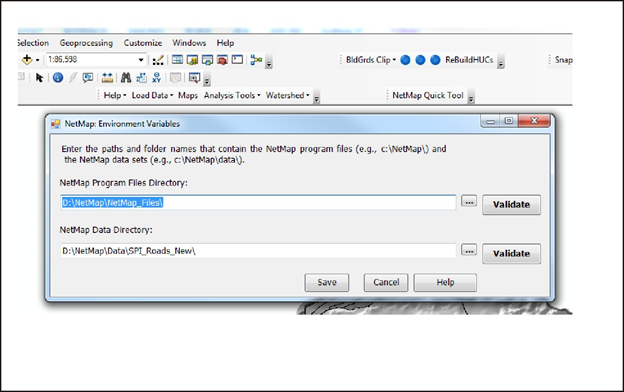 A window will appear, asking you to enter, or browse to the folders where you stored your NetMap Files and NetMap Datasets. The path names should look like this (if you are using C drive):
NetMap Program Files Directory: C:\NetMap\NetMap_Files
Or if you used the Windows unzipping, it might look like this: C:\NetMap\NetMap_Files_07_18_2013\NetMap_Files
and
NetMap Data Directory:
C:\NetMap\NetMap_Datasets
Here is an example, the specific path is not important as long as it exactly matches the drive and folder sequence where the NetMap_Files and NetMap_Datasets are located.
Press "validate" to confirm correct data and tool paths.
 Once you have done this step, you will never need to do this again as long as your NetMap folder stays in the same place on your C: or other drive.
Step 6: Load your watershed.
 NetMap is now ready to go. However, NOTE, that the first time you use NetMap tools you will be prompted to type in your Username (which you should have received from Terrain Works). If you have not received a user name, please contact us.
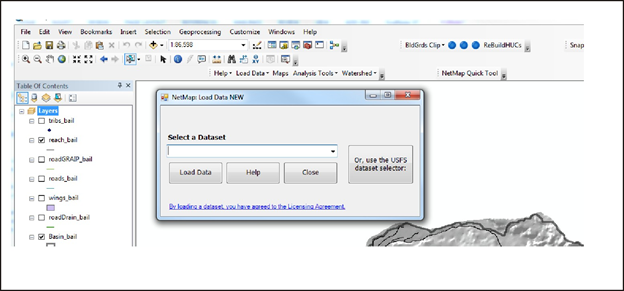
Using “Load Data” in the Add-in, you can load a dataset and begin NetMapping. Click “List Datasets” in the Load Data drop down menu and then use the drop down menu in “List Datasets” to find the watershed dataset you want to work with. If you have properly unzipped these files, they should all appear in this final drop down menu.
Refer to the “Help” tab in the Basic Tools to access NetMap’s online technical help. In addition, all tools and attributes in the map generator contain links to specific help topics.
PLEASE NOTE:
Some of the technical help pages show older versions of the NetMap tool add-in; be advised that the NetMap add-in has been updated.
 |